
INSTALLING YOUR CAMERA
What you need:
- Rhombus camera system
- 1 POE switch
- 1 pc. 5-ft ethernet cable
- 1 pc 50-ft ethernet cable
What to do:
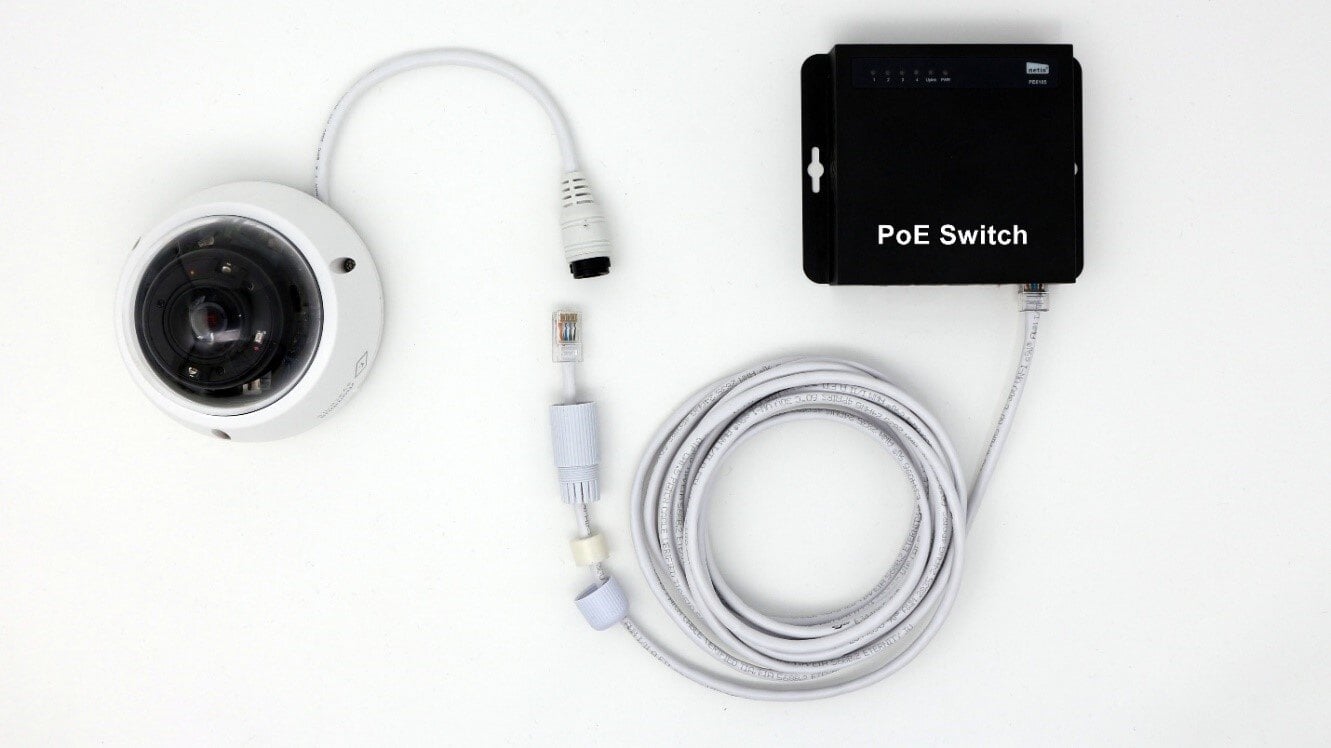
- Please make sure you have all the items listed above before installation. The camera hardware should be included in the shipment. Once unboxed, you can connect the camera to the POE switch using the provided ethernet cable, which should deliver power and internet connectivity.
- Connect the camera to any of ports 1-4 on the POE switch and the internet connection (OptConnect or hardline) to port 5. You can confirm that the camera is powered on if you see a blinking blue/blinking green light on the camera (depending on the model) which would indicate that the camera is now ready to be registered.
Rhombus Camera and Location Naming Convention
Your market's Location Name in the Panoptyc app is pulled directly from the Camera and Location Name set in your Rhombus Console. Follow these best practices to ensure accurate syncing:
-
The Camera Name should exactly match the Location Name
-
For locations with multiple cameras, append a number to each camera name (e.g., Camera 1, Camera 2)
-
Location Names must be unique within your Rhombus Console. If multiple markets share the same area, building, or compound, add a distinguishing identifier to each Location Name. For example, Target Compound Bldg 1 or Target Compound Bldg 2.
-
Markets with separate kiosks should likewise be treated as separate locations.
- Important: The location address is required and highly important. Rhombus uses the address to apply the correct local time zone. If the address is missing, incomplete, or incorrect, the camera may stay in UTC and Panoptyc theft reports may show the wrong time.
REGISTERING YOUR CAMERA TO YOUR RHOMBUS DASHBOARD
Once the camera is connected to power and the internet, the next step would be to register it to your organization’s Rhombus console.
The Panoptyc team will send you an invite link to your organization’s Rhombus console. You do not need to create your own organization on Rhombus. Please reach out to support@panoptyc.com if you need to be resent the invite link.
There are two ways you can register your camera/s: through the Rhombus website or the mobile app. (Download the app here: ANDROID | iOS )
What you need:
- Rhombus app (website or mobile)
- Rhombus account
What to do:
Registration through the mobile app
STEP 1: Log into your Rhombus console on the mobile app, then click on ‘Register Devices’
STEP 2: Click on ‘Any Cameras - Register via QR code’
STEP 3: Click on ‘Add New Location’
STEP 4: Fill in the details for your location such as the location’s name, address, and city, then click on ‘Create Location’.
Important: Do not skip the address field. Make sure the address is complete and accurate before creating the location. This helps Rhombus assign the correct time zone to the camera.
STEP 5: Clicking on ‘Create Location’ should lead you back to the Locations list, click on the Location you created.
STEP 6: Make sure you use Ethernet as your source of internet connection, then click on ‘Next’.
STEP 7: Point the QR code to the camera to register it. You should hear a clicking sound from the camera. The LED light should turn solid blue/ solid green (depending on the camera model) once the camera has been successfully registered, and you should be able to see the camera on your Rhombus console.
Registration through the website
STEP 1: Log into your Rhombus console on the website, then click on the ‘Devices’ tab on the left side of the screen.
STEP 2: Once you are on the Devices tab, click on ‘Register Cameras’
STEP 3: Click on ‘Next’ if you want to proceed with registering the camera through the website. Otherwise, you can download the mobile app, and register the camera/s there.
STEP 4: Click on ‘or add a new location’ to add the location where the camera will be set up
STEP 5: Input the location details, such as the location name and address, then click on ‘Save’
STEP 6: After clicking on Save, it should lead you back to the list of locations. Choose the location that you created and click on ‘Next’
STEP 7: Choose ‘Ethernet’ as a source of internet connectivity, then click on ‘Next’
STEP 8: Set the Installer role to ‘View Only’, then click on ‘Next’
STEP 9: Click on ‘Next’ until you get to the QR code.
STEP 9.1: Point the camera to the QR code to register it. You should hear a clicking sound from the camera, and the LED light should turn solid blue/ solid green (depending on the camera model) once the camera has been successfully registered, and you should be able to see the camera on your Rhombus console.
TROUBLESHOOTING
Troubleshooting if the camera is not registering:
- The most common reason that the camera is not registering is because of internet connectivity. If you are using an OptConnect, please ensure that the device is getting a good signal. If you are on a hardline connection, then you will want to ensure that the location’s network requirements are met with the installation site’s IT department.
- Hardline connection network requirements: see Rhombus requirements here
- Depending on your account permissions, you may not be able to see the camera on your Rhombus console even when it has been successfully registered. To view the camera, you may reach out to our Support team at (313) 425-5765 or support@panoptyc.com to request access to the camera.
- If you are still having issues with registering the camera, you may reach out to our Support hotline (313) 425-5765 so that we can further assist you with troubleshooting.