
Asset Recovery Reports can be created in two ways:
Before You BeginAsset Recovery is enabled on a per-location basis by a Panoptyc administrator.
If the Asset Recovery option is not visible for a location, contact your Panoptyc Customer Success Manager for assistance.
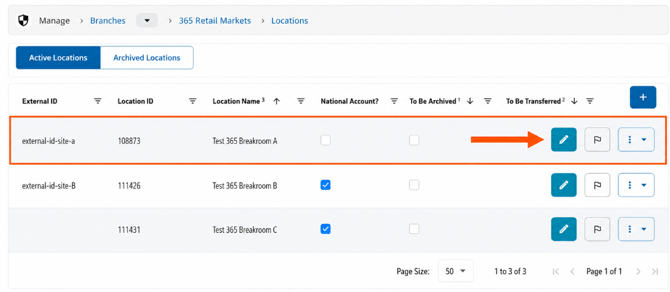
Accessing Asset Recovery- Log in to the Panoptyc website.
- Go to Branches and Locations.
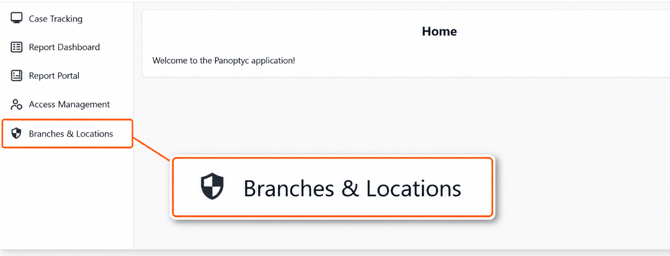
- Find the branch you are assigned to.
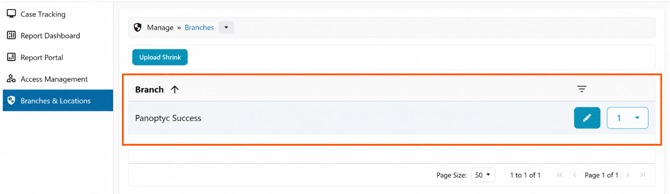
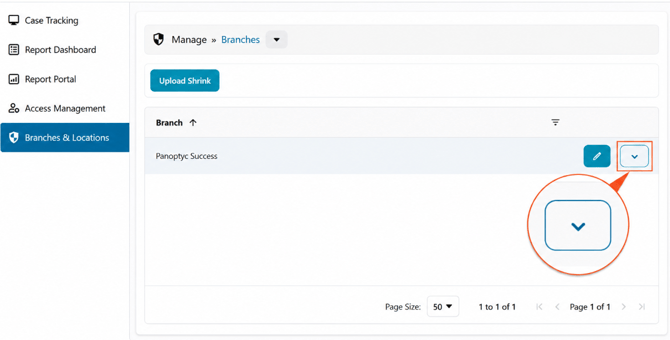
- Click the dropdown arrow on the far right of the branch row.
- Click Location.
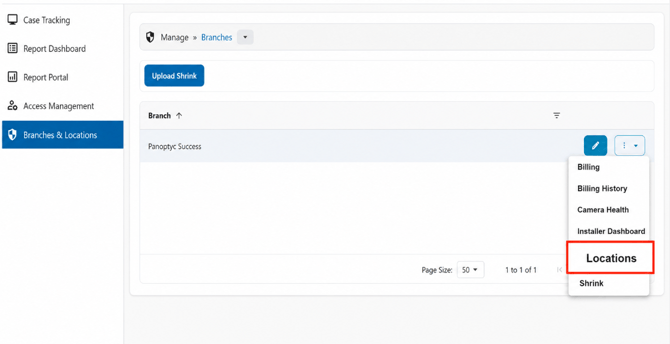
- Select the location you want to manage and click the pencil icon to edit the location.
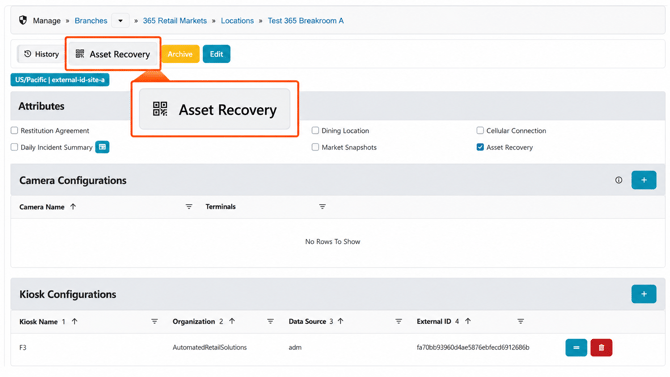
- Click Asset Recovery.
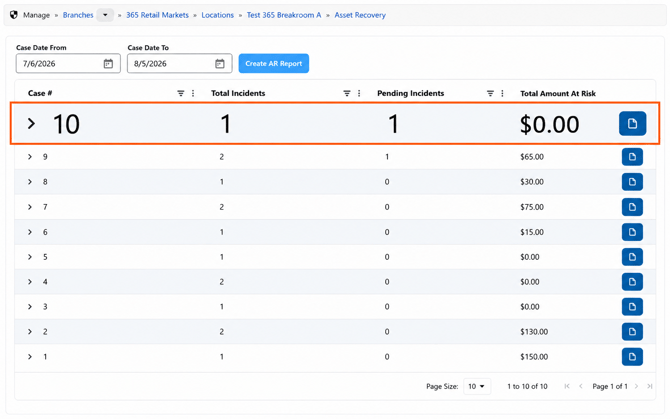
The Asset Recovery page displays the cases and incidents associated with the selected location.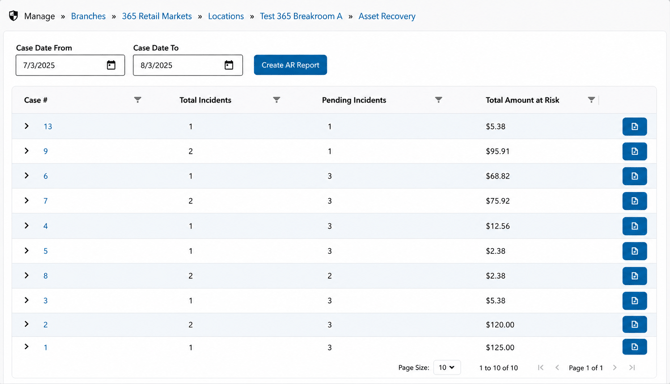
Asset Recovery Page Overview
The Asset Recovery page provides a summary of each case and its related incidents.
Date Filters
Use Case Date From and Case Date To to filter the cases displayed on the page.
Note: When you expand a case, you will still see all incidents associated with that case, including incidents outside the selected date range.
Case Summary
-
Case # – Displays the Panoptyc case number. Click the arrow beside it to view the incidents under the case.
-
Total Incidents – Shows the total number of incidents associated with the case, including those already added to an Asset Recovery Report.
-
Pending Incidents – Shows how many incidents have not yet been added to an Asset Recovery Report. This count updates as incidents are added.
-
Total Amount at Risk – Shows the combined item value of the incidents associated with the case before additional fees.
Incident Details
After expanding a case, you can review:
-
Asset Recovery ID – Displays Not Created until the incident is added to an Asset Recovery Report. Once created, the report’s unique ID will appear. Will have a check icon when the report is shared.
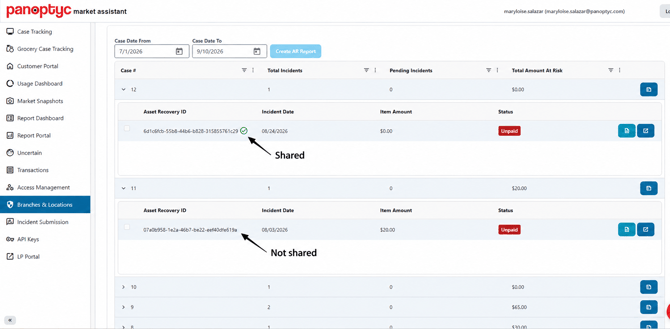
- Incident Date – The date the incident occurred.
- Item Amount – The value associated with the incident. If multiple incidents are added to one report, their amounts are combined.
- Status – Shows the current Asset Recovery status:
- Not Tracked – No Asset Recovery Report has been created.
- Unpaid – A report has been created, but payment is still pending.
- Paid – Payment has been completed.
If payment is made using the QR code, the status automatically updates to Paid. However, this does not automatically resolve the case in Panoptyc. The case must still be resolved separately through the appropriate case workflow.
Creating an Asset Recovery Report
I. Via Asset Recovery Dashboard
- Find the case for which you'd like to create a report
- Expand the case and select the appropriate incident or incidents.
You may select one or multiple incidents when creating a report. Selected incidents will be combined into one Asset Recovery Report.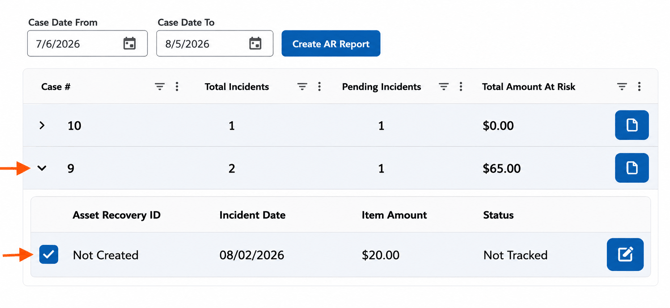
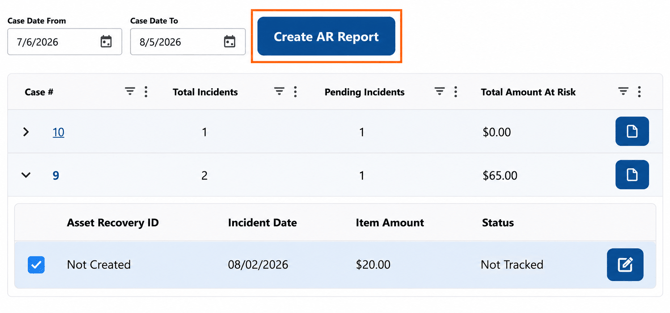
- Click Create AR Report.
- Enter a name for the Asset Recovery Report.
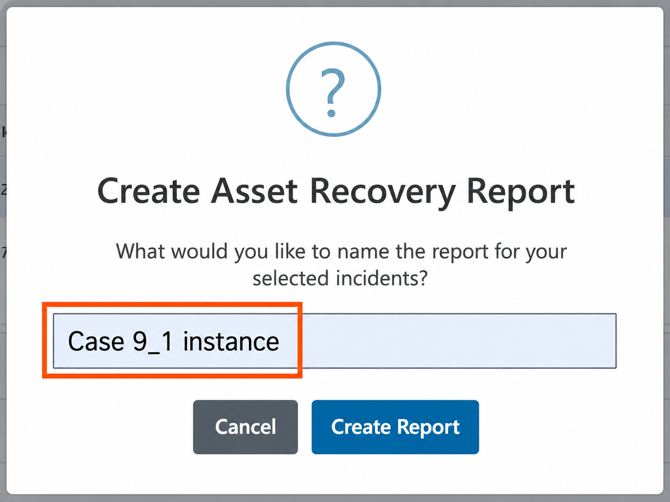
- Click Create Report.
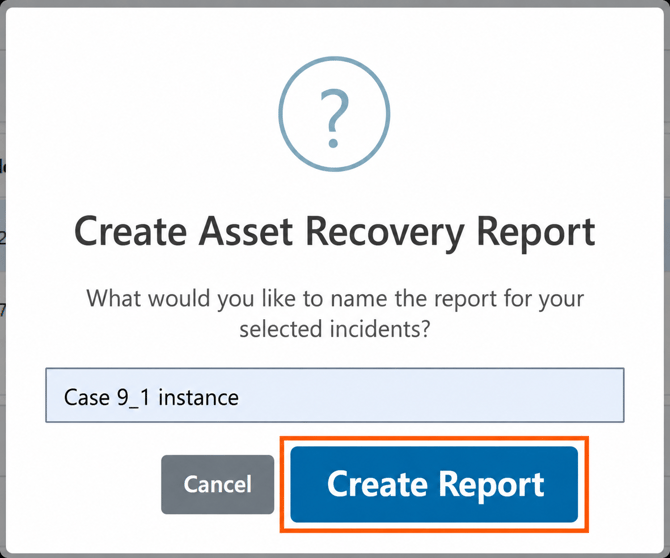
You will be redirected to the Asset Recovery Report page.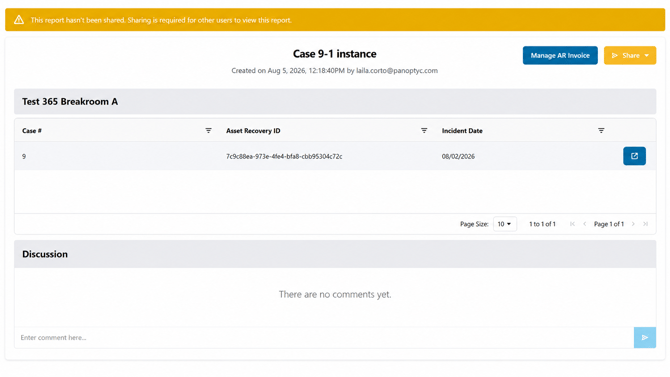
II. Via an Incident Report or Case Report
You can also create an Asset Recovery Report directly from a case in the Case Tracking Portal or Report portal.
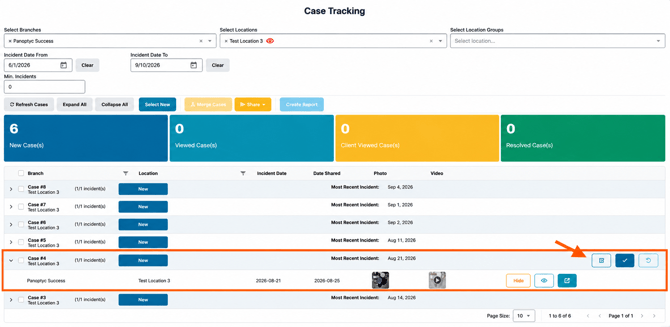
- Go to Case Tracking.
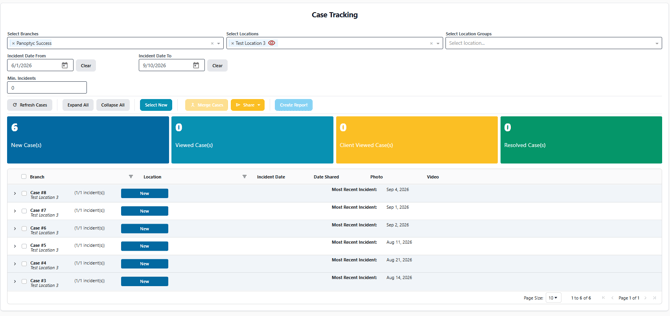
- Find the case you want to create an Asset Recovery Report for and expand the case.
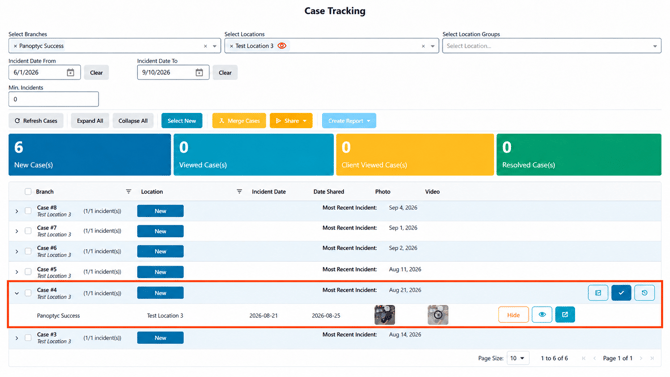
- Click View Case Report to open the Suspicious Incidents Report.
- Select the incident or incidents you want to include in the Asset Recovery Report.
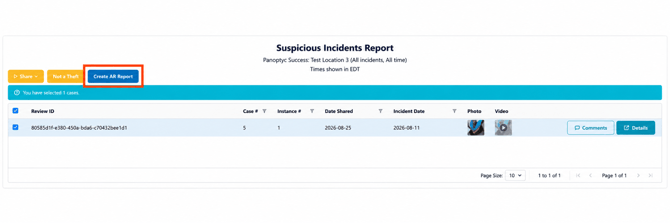
The Create AR Report button becomes available once an incident has been selected.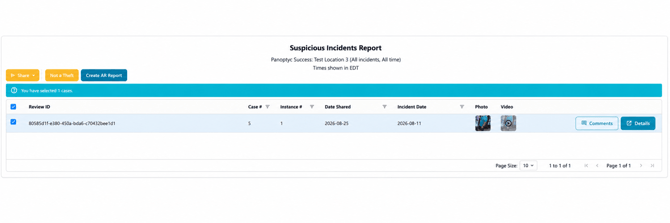
- Click Create AR Report.
- Enter a name for the Asset Recovery Report.
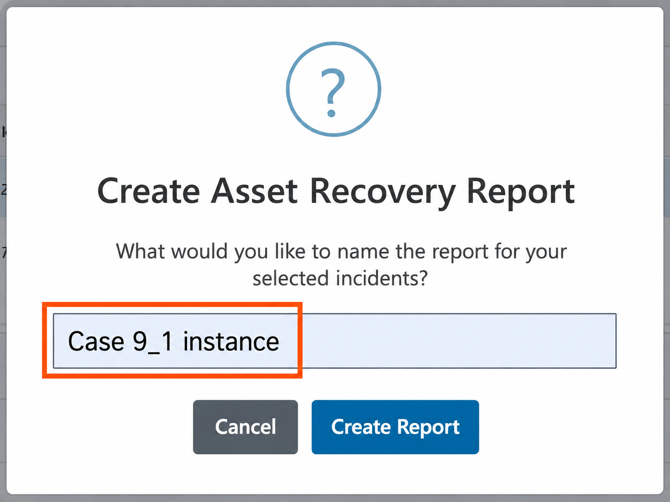
- Click Create Report.
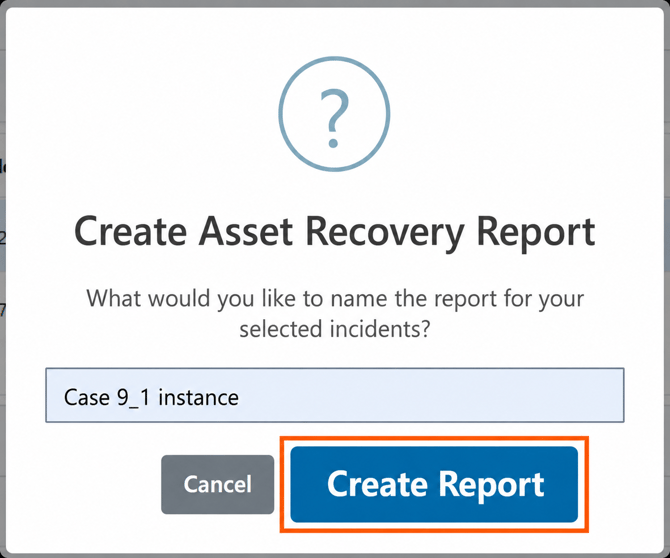
You will be redirected to the Asset Recovery Report page.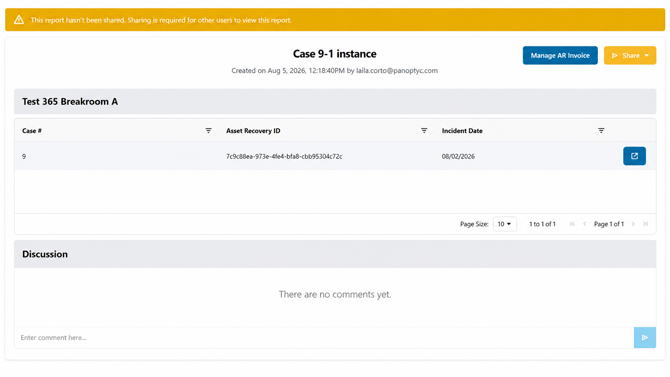
Important Information About Created Reports
Once an Asset Recovery Report is created, it is assigned a unique Asset Recovery Report ID.
After an incident has been assigned to an Asset Recovery Report:
- The incident cannot be removed from that report.
- The incident selection for the report cannot be changed.
- The Asset Recovery Report cannot be deleted.
Review the selected incidents carefully before creating the report.
If another incident is later added to the same Panoptyc case, it will not automatically be added to the existing Asset Recovery Report. A new Asset Recovery Report must be created for the new incident.
Reviewing and Updating the Invoice
From the Asset Recovery Report page, click Manage AR Invoice.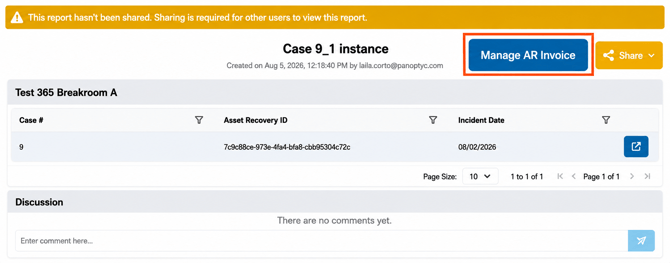
The invoice displays the combined base value of all incidents included in the report. This is the initial amount to be recovered.
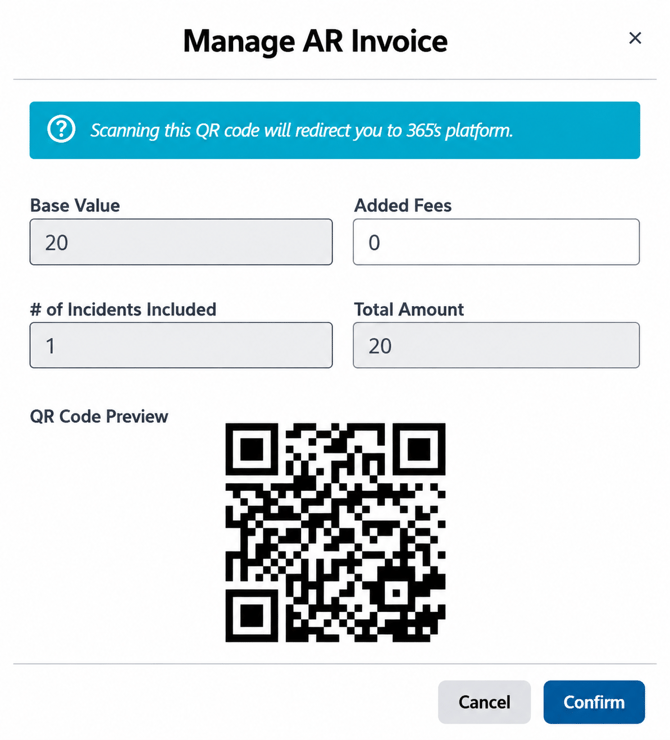
Branch users may also add applicable fees to the base recovery amount.
Example
- Base recovery amount: $45
- Additional fee: $10
- Total recovery amount: $55
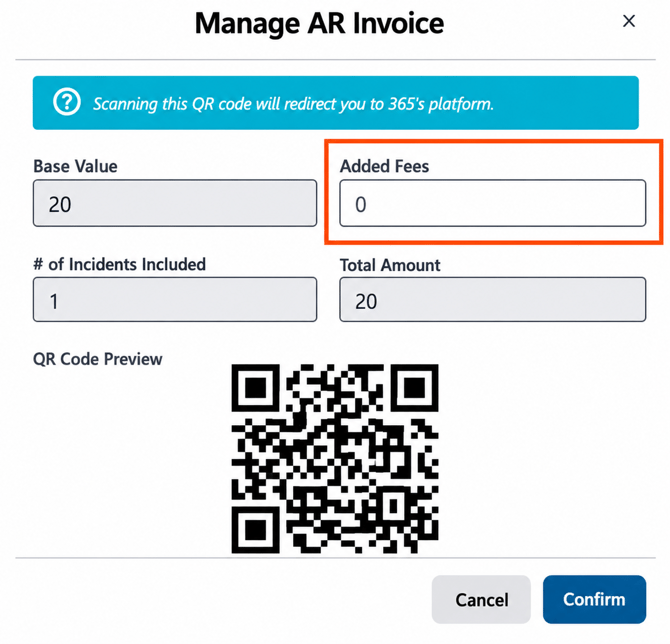
To update the invoice:
- Enter the additional fee, when applicable.
- Review the updated total amount.
- Click Confirm
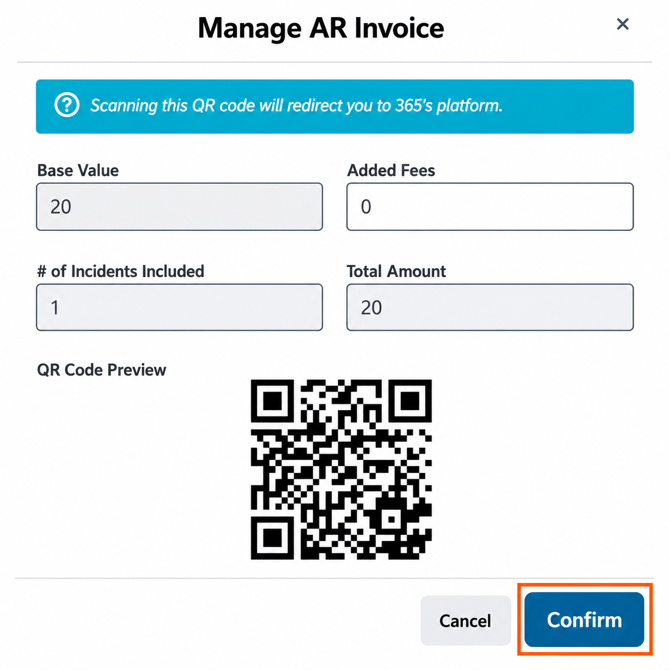
Only authorized branch users can add or edit fees. Guest users can view the invoice and recovery breakdown but cannot change the fees or total recovery amount.
Sharing the Asset Recovery Report
Once the invoice has been reviewed and confirmed, the Asset Recovery Report can be shared with a guest user.
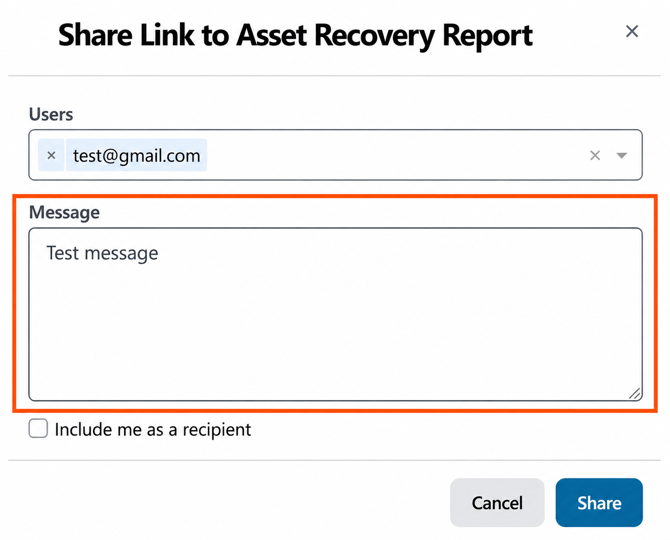
- Click Share.
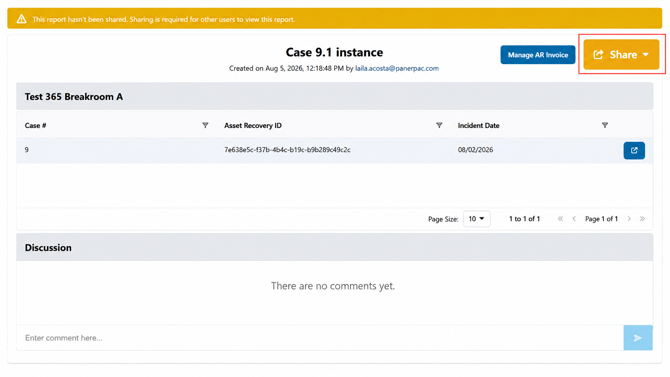
- Select an existing guest user or enter the information for the person you want to share the report with.
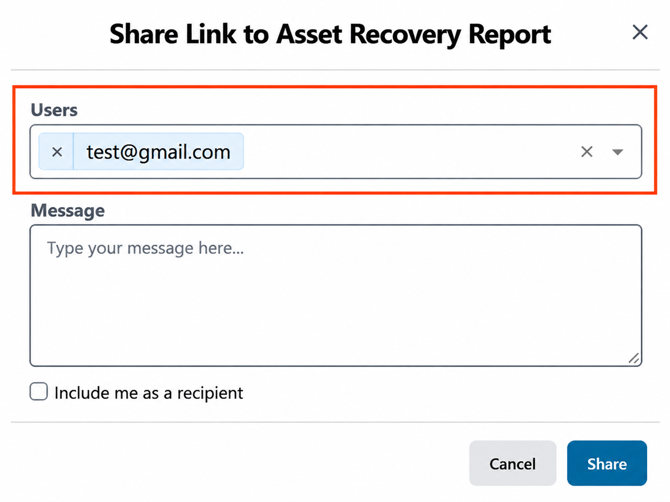
- Enter an optional message.
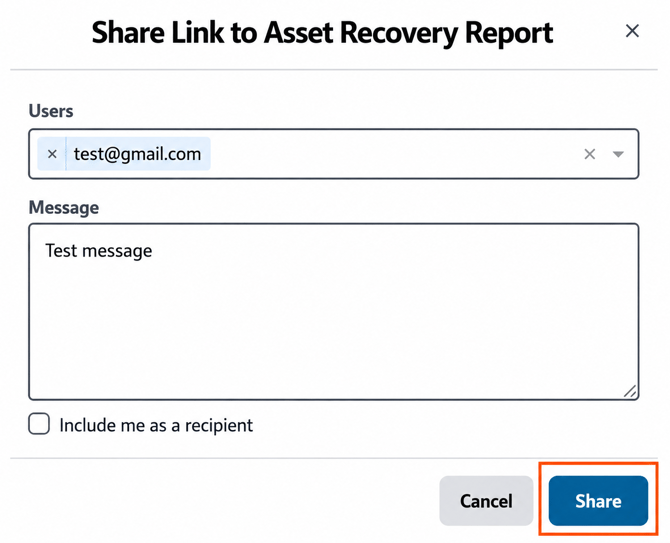
- Send the report.
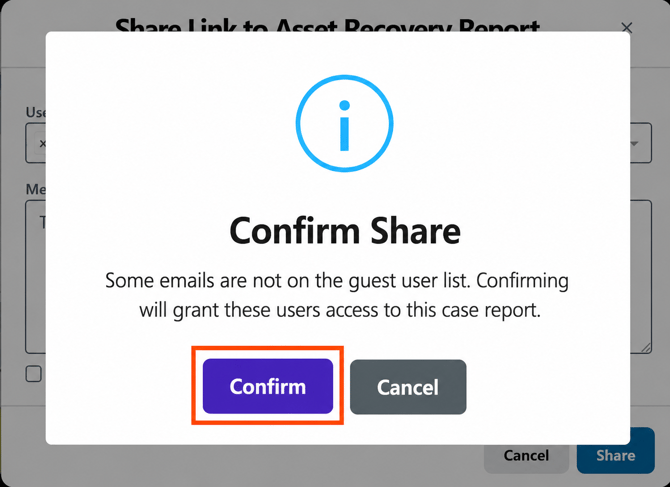
When the report is shared with someone who is not yet included in the location’s guest user list, that person is automatically granted the Guest role, similar to Panoptyc’s other sharing workflows.
The recipient will receive an email containing:
- The Asset Recovery Report details
- The total recovery amount
- A link to view the report
- A QR code that directs the user to the payment page
Viewing the Asset Recovery Report
Only users who have been granted guest access can open the Asset Recovery Report through the link included in the email.
After opening the link, the guest user can review:
- The Asset Recovery Report
- Available incident details
- The invoice
- The recovery amount breakdown
Guest users can view this information but cannot edit the fees or change the total recovery amount.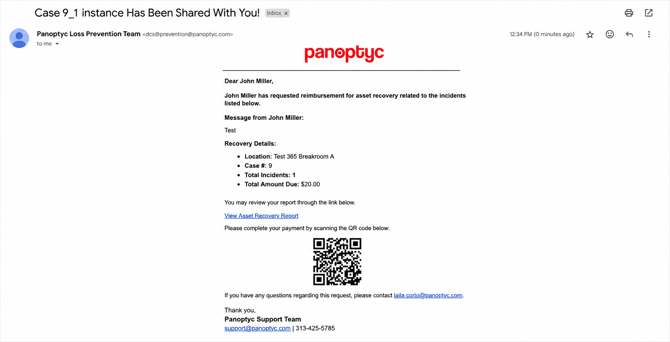
Using the QR Code for Payment
The QR code included in the email directs the user to the payment page.
The guest user may:
- Scan the QR code and complete the payment
- Forward the email to the individual responsible for payment
- Share a screenshot of the QR code with the responsible individual
The payment may be completed by the client or by the offender responsible for the incident.
The person using the QR code does not need access to the complete Asset Recovery Report to proceed to the payment page.
Once payment has been completed, the Asset Recovery status automatically updates to Paid. The related Panoptyc case will not be automatically resolved and must be handled separately.
Adding New Incidents to Asset Recovery
New incidents added to an existing case are not automatically included in a previously created Asset Recovery Report.
For example, when a report has already been created for one incident and another incident is later added to the same case, the new incident will appear as:
- Asset Recovery ID: Not Created
- Status: Not Tracked
A new Asset Recovery Report must be created for the additional incident.
Important Reminders
- Confirm that the correct location is selected before creating a report.
- Review all selected incidents before clicking Create AR Report.
- Multiple selected incidents will be combined into one Asset Recovery Report.
- Once incidents are assigned to an Asset Recovery Report ID, they cannot be removed or transferred to another report.
- Created Asset Recovery Reports cannot be deleted.
- Review the base value and additional fees before confirming the invoice.
- A new recipient is automatically granted the Guest role when the report is shared with them.
- The QR code may be forwarded to the individual responsible for payment.
- A successful payment automatically updates the Asset Recovery status to Paid.
- Create a new report for incidents that were not included in the original Asset Recovery Report.