
Accessing the Case Tracking Portal
- Log in to the Panoptyc Portal (app.panoptyc.com)
-
- Use your credentials to access your dashboard.
-
- Navigate to the Case Tracking section.
- Selecting a Branch and Location
-
- From the toolbar, choose the branch you want to review.
- Select the location or multiple locations you wish to view.
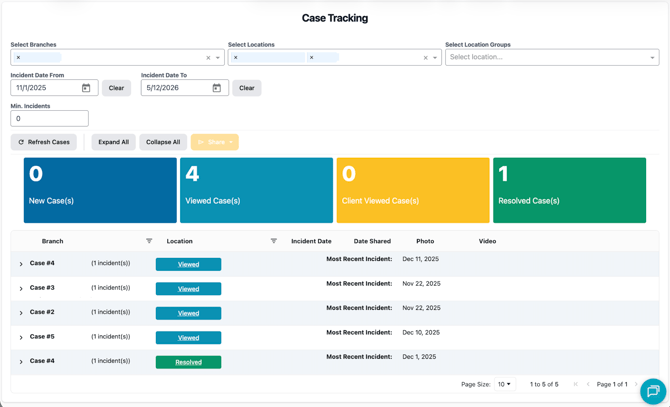
Understanding Cases
Once you navigate to the Case Tracking Portal, you will see a list of Cases, which are consolidated records of repeat offenders. Each case contains multiple incidents associated with the same offender. Clicking on a case will reveal all relevant incidents, allowing you to track patterns and make informed decisions.
Viewing Cases
After selecting your location(s), a list of cases will appear. Click on a case to see more details, including:
- Incident Date: The date the incident occurred (for repeat offenders, the most recent incident will also be displayed).
- Date Shared: The date the case was shared.
- Details: Additional notes and information about the case.
Each case will have a status indicator:
- New Case (Blue Box) – A newly reported case.
- Viewed by Your Team (Light Blue Box) – A case reviewed by your internal team.
- Viewed by Your Client (Yellow Box) – A case that has been accessed by your client.
- Resolved (Optional) – A case that has been closed or marked as resolved.
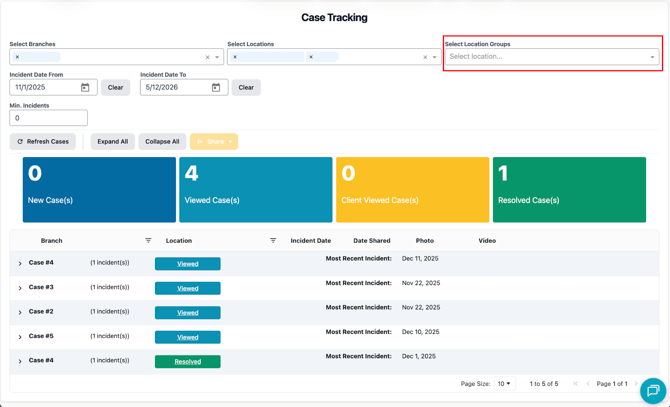
Location Groups in Case Tracking Portal
We’ve added a new “Location Group” dropdown filter in the Case Tracking Portal to make it easier for users to view and manage cases across multiple locations.
- You can now filter cases by Location Groups, rather than selecting branches individually.
- Each group represents a set of related locations, including National and Non-National accounts.
- This update helps streamline workflows and ensures more consistent access across enterprise accounts.
Key Benefits
- Quickly view cases for all locations within a group.
- Save time by avoiding manual branch selection.
- Improve efficiency and visibility when reviewing enterprise-level data.
How It Works
- Go to the Case Tracking Portal.
- Use the Location Group dropdown filter at the top of the page.
- Select your desired group to view all cases under that group.
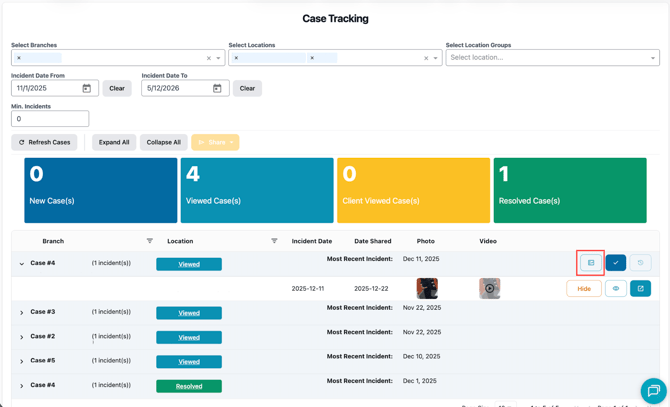
Accessing the Case Report
- Click the View Case Report button to open the case report screen.
Sharing a Case Report
- Select which incident(s) you want to share with your clients or team.
- Click the Share button and enter the recipient’s email address.
- Once shared, the added email address will be whitelisted, and the recipient will receive a notification via email.

Note: The Share button is intended for sharing with one user/email address at a time. Reports cannot be shared with multiple recipients simultaneously. If you need to share the report with additional people, please add their email address one at a time.
From the case details page, you can choose to view the Case Report, which opens a detailed report screen similar to the All Incident Reports page.
- The report will only include clips that you have chosen to share with your clients rather than all available footage in the dashboard
To review a case effectively, ensure that all relevant details are verified before sharing with your clients.
When customers share Case Reports through the Case Tracking Portal, they can now:
- Include a custom message to their clients within the shared email
- Include themselves as a recipient of the email
If the sharer chooses to include themselves, they will be CC’d on the email thread for reference and tracking purposes.

Removing a Case/Instance from the Report
- Click Select, then choose which case/instance you want to remove.
- Possible reasons for removal:
- Invalid theft
- Footage cut too short
- Inconclusive footage
- Click Not a Theft
- Feature Limitation: Once a case/instance is removed, it cannot be unarchived. If you need help verifying the case/instance, please contact our support team.

Merging Cases
- Click Select to merge cases, then choose the cases you want to consolidate.
- The selected cases will be merged under the first/earliest case number.
Building a Case Report
- Select a case and click the Share button.
- Recipients will receive an email notification once the case report is shared.
Email Preview:
